Your average end-user does not like to have to repeat themselves, so asking them to fill in a word-template and afterwards asking for the same values to be filled in as metadata will upset them. This is where we look at how we can help users saving time and limiting annoyances. While there are several means to an end, in this post we will focus on the use of Quick Parts in Office 365 and Word.
Setting the stage
We are going to take the classic example of having multiple sites and site collections where people would like to save meeting notes (I know, we could also use OneNote… but just follow for the exercise’s sake 
Often several teams create their own solutions to manage keeping meeting notes. The biggest problem is that we are missing consistency when comparing across sites, missing similar metadata, missing a word template, missing approval flows.
Luckily, we can use the power of Content Types to solve most issues here. Using Content types, we can now create a solution on Tenant-level (or Farm-level if you are still on-prem). We are creating a content type with following fields:
- Meeting Date (Date/time)
- Meeting Type (Choice)
- Note taker (people picker)
- Customer (Managed Metadata)
Using quick parts
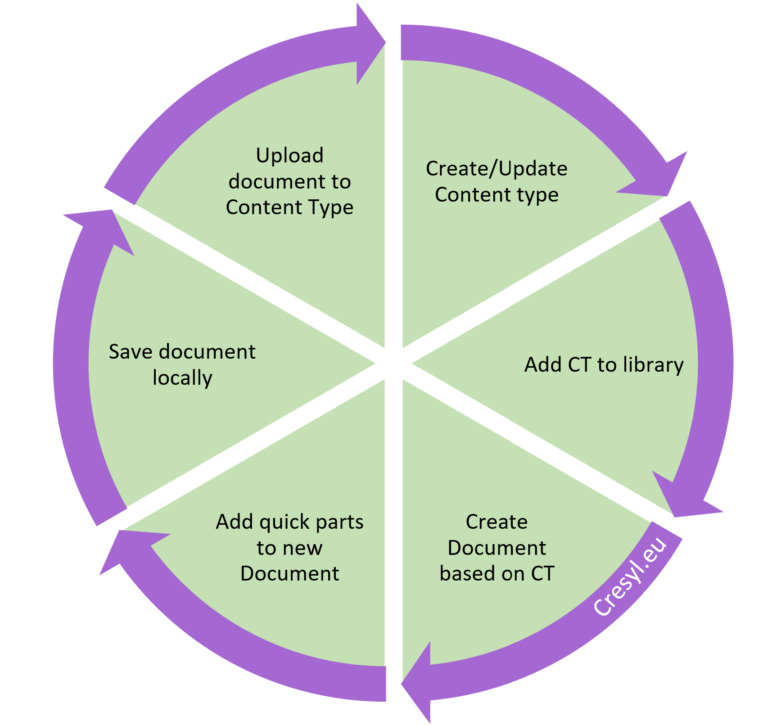
Now that we created our content type, the next step is to add the content type to a library. If you’re new to this, check out the steps the perform this here.

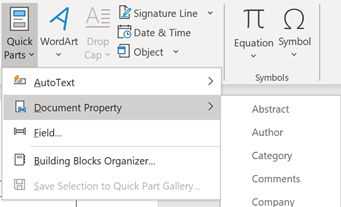
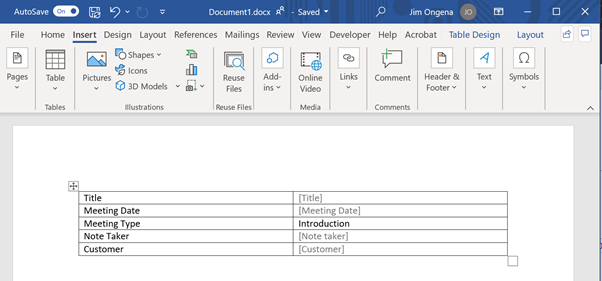
Next, we create a document based on the newly added content type and insert the metadata fields within the open document using the quick parts option. You will find this in the Insert Ribbon under the Text Group.

In the example I created, I added a table to allow for clean alignment and to be able to add a label in front of the quick parts. You will notice that the ‘Meeting Type’ is already filled in, which is due to it having a default value.

Save the newly created document locally (you could save it to SharePoint, but that will bring some unexpected issues). Make sure that you do not fill in any of the other Quick parts before you save the file.
The last preparation step is to upload the file to our content type. So, go back to ‘site content types’ in your site or content type hub. Navigate to your content type and select the ‘Advanced Settings’. Here you will find two options:
- Enter the URL of an existing document template
- Upload a new document template

Select the second option (read the focus box to know why you would better not select the first one).
Then, upload your local file and save the settings.
From this point onwards, you will be able to create a new document based on the content type, and immediately having the right template with quick parts. If you need to perform any updates to your template, just perform steps 4-6 again.
Although the use of quick parts can provide you with an easy solution to embed metadata in documents, there are some limitations.
- Only works for Word, not for Excel or PowerPoint
- Does not work in Word online for changes and modifications
- If you add a template using the URL instead of the upload, the connection with the metadata is lost,
Using the option “Enter the URL of an existing document template”
In many organizations, document templates are managed by the communications department. It would make sense that those people can directly manage and push their changes to the whole organization, without having to go through the whole update process.
You can achieve this by using the option “Enter the URL of an existing document template”. While you can use this solution to provide the means for the communications team, you cannot use it in combination with quick parts. Ever since this option was introduced, it always has been breaking the connection between the content type metadata and the quick parts.
So in brief, if you want to give power to the communication department to manage the templates, you’ll have to give up on the advantages of embedding quick parts.

